Google Docs is one of the best ways to edit and share office documents online. The interface is easy to manage and all the data is stored in the cloud making it accessible from anywhere. Sharing Google Docs is a huge plus when collaborating with others on projects, presentations or what not and while sharing is great, sometimes the owner of a document needs to change.
There may be several reasons for changing ownership of a document. Perhaps a project started by one person is being passed onto another, maybe the docs account is being deleted and the files need to be associated with a new owner, or maybe the ownership responsibility just needs to change. Whatever the reason, knowing how to change owners is a nice bit of information to have around.
How to Change the Owner of a Google Doc
- Open the Google doc that needs to change ownership.
- Click the blue ‘Share‘ button in the upper right corner.

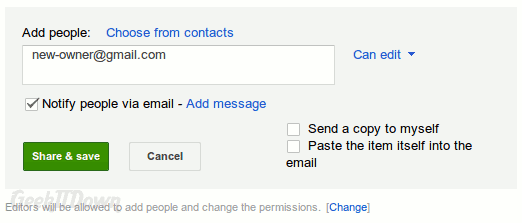
- In order for ownership to change, the future owner must already have access to the document. To give access to the document, enter the gmail address of the person who is to take ownership of the document in the ‘Add people’ field at the bottom of the ‘Sharing settings’ window.

Note: The new owner needs to have a gmail account in order to accept ownership of the Google doc. - Click the green ‘Share & save‘ button.

- You’ll notice the new user is now listed in the ‘Sharing settings’ window. Click the drop-down to the right of the owner’s name and select ‘Is owner‘.
- Click ‘Share & save‘.
Note: There can only be one owner for a document. Once you relinquish ownership, the new owner can revoke your rights entirely to the document.
If you enjoyed or found this article useful, please show us some support by liking us on Facebook or by sharing us on your favorite social website. Thanks!

